

ObservePoint – Web Journeys


Introduction to ObservePoint Web Journeys
ObservePoint Journeys are a great tool that can be used to simulate a user interacting with your website. They can be used to report on marketing or analytics tags, cookies, console errors, and much more. So, they are great for testing critical paths on a website, such as:
- Testing a long loan application journey
- Validating your checkout funnel analytics is working correctly
- Confirming that your marketing tags are collecting the right data
The tool itself is quite simple but has some particularly useful features that allow for automated testing and auditing. We’ll look at some of those features in this blog!
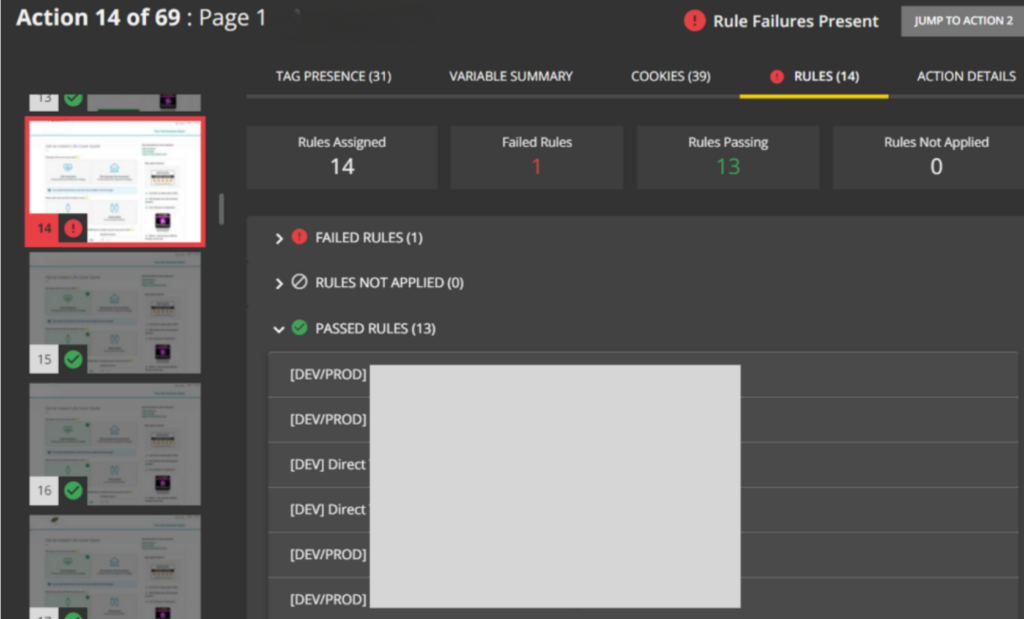
Journeys Snapshot
Journeys can give you a snapshot of what appears in the data layer throughout the journey, giving you a full picture of what is being captured and what is available to capture in any analytics or marketing tags.
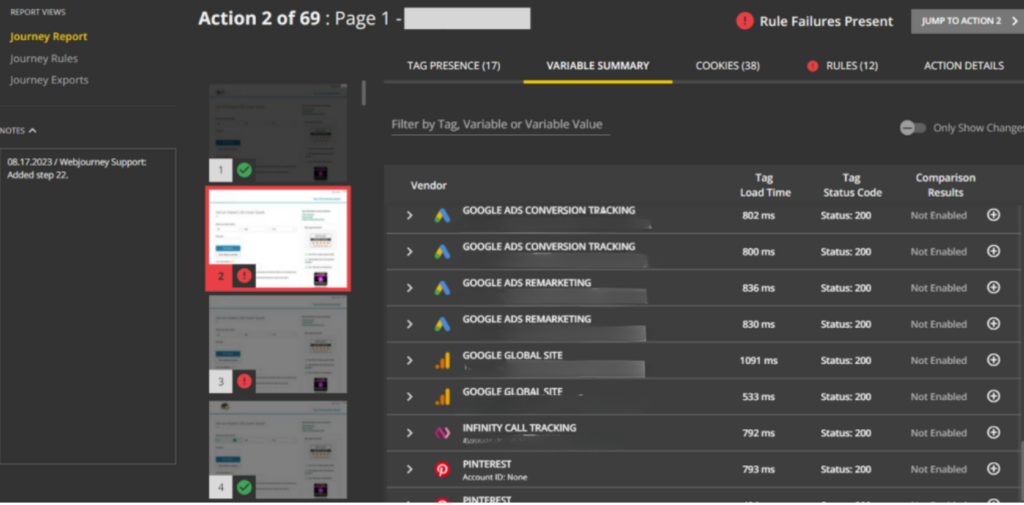
The screenshot above depicts a typical running web journey. On the left-hand side, you have the actions listed, which you can select. Upon selection, you can see snapshots of the firing tags, the variables within those tags, their values, cookies, and whether a rule (condition) has failed or succeeded.
This can be really helpful to run through and test a journey every time you make a change on the website to ensure all analytics and marketing tags are functioning correctly.
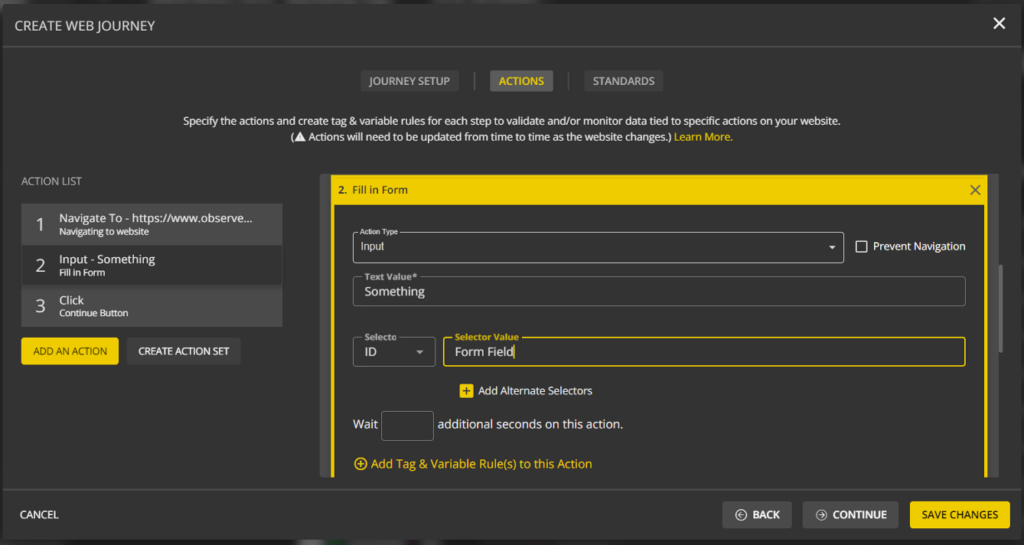
Setting Up Journeys:
To set up a web journey, actions must be manually configured at the outset. These actions serve as steps guiding ObservePoint to the desired checkpoints. For instance, the process might be: Navigate to website -> Fill in form -> Click the ‘Continue’ button.
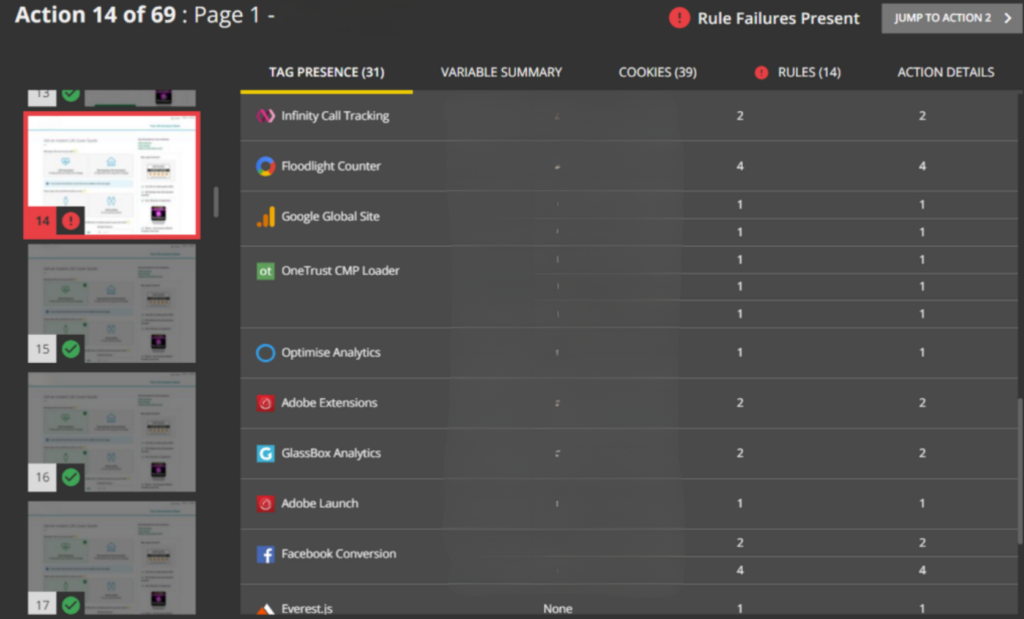
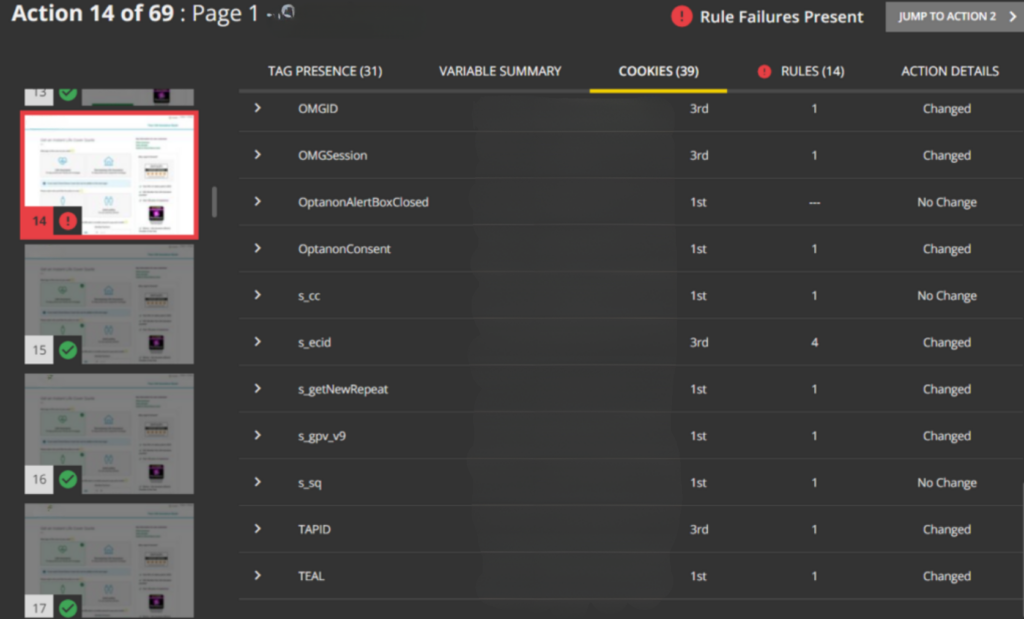
Output of a Web Journey:
Once the journey is run for the first time, you can view the output. This can be seen in the following tabs:
- Tag Presence shows what tags have sent network requests when the action happened
- Variable Summary shows all the different network requests, any data layer updates, and variables and their values.
- Cookies tab shows all cookies and their attributes.
Screenshots of all tabs can be seen below. A link explaining each of these in more detail can be found on the ObservePoint website here: https://help.observepoint.com/article/224-journey-report

Rules and Rule Application
Lastly, the Rules tab shows whether a rule has failed or passed.
Rules are applied to either the journey or the steps themselves. These rules are a list of conditions which flag either the whole journey or the step itself. For example, if you want to make sure the data layer exists throughout the journey you can have a rule applied to the whole journey which has the condition “does the data layer exist?” If the rules are not matched, then it will flag the journey with an error.
As mentioned, you can also apply these rules to the individual step as well. This is to enable the rule to check for a specific value within a tag at the step it is applied to. For example, on the conversion page, a Facebook tag needs to fire with the revenue in it.
Journeys as a Testing Tool
Hopefully, this demonstrates how Web Journey can be a particularly useful tool within ObservePoint, for when you need quick testing after making a change to either the website or any implemented tags. Rules allow you to see if a journey is behaving as expected, and the other information provided by the web journey also allows you to deep dive into what is potentially available to track in other tags going forward.
For more information, check out ObservePoint’s documetation on the feature: https://help.observepoint.com/article/248-creating-journeys